Whether you’re a car owner looking to refresh your vehicle’s appearance, a DIY enthusiast, or a professional in the auto body repair industry, understanding the auto painting process is crucial. This guide will walk you through each step, from preparation to the final polish, providing you with the knowledge to achieve a flawless finish. We’ll also explore various service options and pricing to help you choose the best approach for your vehicle, ensuring you get the most value for your investment.
Preparation
Before any paint touches your vehicle, thorough preparation is essential. Proper preparation ensures that the paint adheres well, looks smooth, and lasts longer. This stage involves cleaning, sanding, and masking, each of which plays a critical role in the final outcome.
Surface Cleaning and Degreasing
The first step in any auto-painting process is to clean and degrease the vehicle’s surface thoroughly. Dirt, grease, and other contaminants can prevent the paint from adhering properly, leading to issues like peeling or bubbling down the line.
Using a high-quality degreaser, carefully wipe down every part of the car that will be painted. Pay special attention to areas that are prone to oil and grime buildup, such as around the engine bay and under the car’s body panels. This step is crucial in creating a clean slate for the paint to bond to, ensuring a smooth and even finish.
The image highlights the importance of surface preparation by offering different sealer options, such as Universal, Urethane, and Ultimate Urethane. Choosing the right sealer depends on the desired finish and your budget, with each type offering varying levels of protection and durability.
Sanding the Surface
Once the vehicle is clean, the next step is sanding. Sanding smooths out the surface, removes the old paint, and helps the new paint adhere better. The process typically involves multiple stages, using different grit levels of sandpaper.
- Coarse grit sandpaper (60-80 grit) is used initially to remove old paint and rough up the surface.
- Medium grit sandpaper (120-180 grit) is used to smooth out the roughness from the initial sanding.
- Fine grit sandpaper (320-400 grit) is employed to achieve a smooth, even surface ready for priming.
In addition to general sanding, specific repair services like Light Scratch/Chip Repair ($149.95) and Medium Scratch/Chip Repair ($199.95) often require focused sanding to ensure these imperfections are fully smoothed out before painting.
Masking and Taping
Masking is an often overlooked but vital part of the auto painting process. Proper masking ensures that only the areas you want painted are exposed, while everything else—windows, trim, tires—remains untouched.
When masking, it’s crucial to use high-quality painter’s tape and masking paper or plastic. Start by covering large areas, like windows, with plastic sheeting, and then use tape to secure the edges. Pay close attention to edges and seams, ensuring the tape is applied evenly to prevent paint from bleeding under it. Achieving clean, sharp lines requires precision and patience, but it’s well worth the effort for a professional-looking finish.
Priming
Priming is the foundation of a good paint job. It creates a smooth base that allows the paint to adhere properly and enhances the durability and appearance of the final coat.
Applying the Primer
Primer plays a crucial role in the auto painting process. It not only helps the paint stick to the surface but also blocks stains, prevents rust, and fills in minor imperfections. Applying the primer evenly is key to achieving a smooth final finish.
To apply primer:
- Start with a clean, dry surface.
- Apply the primer in thin, even coats, usually 2-3 layers, allowing each coat to dry before applying the next.
- Use a steady hand and maintain a consistent distance from the surface to avoid drips and uneven coverage.
For best results, choose a primer that is compatible with both the existing surface and the type of paint you plan to use.
Sanding the Primer
After the primer has been applied and has dried completely, the next step is to sand it down to create an ultra-smooth surface for the paint. This step is crucial for eliminating any minor imperfections that may have occurred during the priming process.
- Use fine-grit sandpaper (600-800 grit) to gently sand the primer.
- Sand in circular motions, applying even pressure to avoid creating scratches.
- After sanding, wipe the surface with a tack cloth to remove any dust.
This meticulous sanding process ensures that the surface is perfectly smooth, setting the stage for a flawless paint application.
Painting
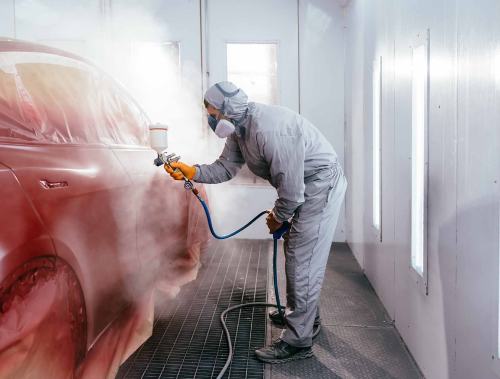
With the preparation and priming complete, it’s time to move on to the painting stage. Choosing the right paint and applying it correctly are crucial for achieving a high-quality, durable finish.
Choosing the Right Paint
Selecting the right type of paint is essential, as it affects both the appearance and longevity of the finish. There are several options to consider, each with its own benefits and price points:
- Acrylic Enamel ($599.95): This high-gloss option is budget-friendly and ideal for a basic paint refresh.
- Urethane Single Stage ($799.95): More durable than acrylic enamel, this paint provides better protection and a smoother finish.
- Base Coat/Clear Coat ($1299.95): Known for its enhanced color and durability, this option is a great middle-ground for those seeking quality without breaking the bank.
- Premium Base/Clear ($1499.95): The top-of-the-line choice, offering superior depth of shine and long-lasting protection.
Each of these options has its own set of advantages, so choose the one that best fits your needs and budget.
Applying the Base Coat
The base coat is where your vehicle starts to take on its new color. Applying the base coat requires patience and precision to achieve even coverage and a smooth finish.
- Multiple thin layers: Instead of applying one thick coat, apply multiple thin layers of paint. This helps to avoid drips and ensures even coverage.
- Consistent distance: Maintain a consistent distance from the surface while spraying. This is usually around 6-8 inches, depending on the spray gun used.
- Steady hand: Move the spray gun in a steady, sweeping motion, overlapping each pass slightly to ensure even coverage.
Allow each layer to dry before applying the next, and inspect the surface between coats to ensure there are no imperfections.
Applying the Clear Coat
The clear coat is the final layer that protects the paint and adds a glossy finish. It seals the base coat, providing UV protection and enhancing the color.
- Even application: Just like with the base coat, apply the clear coat in thin, even layers. This reduces the risk of runs or orange peel—a textured finish caused by improper application.
- Final touches: After applying the clear coat, allow it to cure fully. This may take several hours to a full day, depending on the type of paint and environmental conditions.
Drying and Curing
After all the layers have been applied, the drying and curing process is crucial for achieving a durable, professional finish.
Allowing the Paint to Cure
Curing is the process where the paint fully hardens and bonds to the surface. It’s important to give the paint sufficient time to cure between coats and after the final application.
- Patience is key: Rushing this process can lead to flaws in the finish, such as bubbling or cracking.
- Baked to Cured: For higher-end services, shops often use “Baked to Cured” processes. This involves baking the painted surface in a controlled environment to speed up curing and ensure a harder, more durable finish.
Finishing
The finishing stage is where the paint job truly comes to life. After all the hard work of prepping, priming, and painting, this final phase focuses on perfecting the surface, enhancing the shine, and ensuring that the vehicle looks as good as new. Finishing includes wet sanding, buffing, and polishing—each step playing a crucial role in the final outcome.
Wet Sanding
Wet sanding is a meticulous process that involves using very fine sandpaper, typically between 1000 to 2000 grit, to smooth out any minor imperfections in the paint’s surface. These imperfections might include small dust particles, uneven surfaces, or slight orange peel texture—a common issue where the paint dries with a dimpled appearance.
- The Process: Begin by soaking the sandpaper in water for about 15 minutes. The water acts as a lubricant, reducing friction and preventing the sandpaper from clogging with paint particles. Working in small sections, gently sand the surface in a circular motion, applying light pressure. Keep the area wet throughout the process to avoid scratching the paint. After sanding, the surface should feel smooth and even, though it may look dull. This dullness is normal and will be corrected in the next step—buffing and polishing.
Buffing and Polishing
After wet sanding, the next step is buffing and polishing. This process restores the paint’s shine and removes any remaining surface imperfections, leaving the vehicle with a glossy, showroom-ready finish.
- Buffing: Buffing is done using a rotary or dual-action buffer equipped with a foam or wool pad. The buffer is used with a polishing compound, which contains fine abrasives that remove a very thin layer of paint, smoothing out any remaining imperfections and restoring shine. Move the buffer in a steady, overlapping motion, being careful not to stay in one spot for too long to avoid burning through the paint.
- Polishing: Polishing is the final step, which enhances the depth of the paint’s shine and provides a protective layer. Use a fine polishing compound and a soft polishing pad, again working in overlapping motions. This step brings out the paint’s full luster, leaving it smooth, glossy, and reflective.
By the end of the buffing and polishing process, your vehicle’s paint should look flawless, with a deep, rich color and a brilliant shine.
Final Inspection and Touch-Ups
Even after the most careful application and finishing, it’s essential to inspect the vehicle thoroughly to ensure that every detail is perfect. The final inspection and any necessary touch-ups are the last steps before your vehicle is ready to hit the road.
Inspecting the Paint Job
A thorough inspection is crucial for identifying any missed spots, imperfections, or uneven areas that may have occurred during the painting process.
- Lighting: Inspect the vehicle under bright, natural light or using specialized inspection lights that can highlight flaws not visible under standard lighting.
- Close Examination: Walk around the vehicle, closely examining all surfaces from different angles. Look for any inconsistencies in the color, texture, or shine, as well as for any small defects like dust nibs or slight orange peel.
- Feel the Surface: Running your hand lightly over the surface can help detect any subtle imperfections that may not be visible but can be felt.
Performing Touch-Ups
If any minor flaws or imperfections are found during the inspection, they can often be corrected with touch-up paint.
- Touch-Up Paint: Use a small brush or a fine applicator pen to apply touch-up paint to any areas that need it. Work carefully to blend the touch-up paint with the surrounding area, applying it in thin layers and allowing each layer to dry before adding the next.
- Buffing: After the touch-up paint has dried, gently buff the area to blend it seamlessly with the rest of the paint job.
This attention to detail ensures that the final result is flawless, leaving no visible signs of the touch-up work.
Conclusion
The auto painting process is a meticulous and multi-step journey that, when done correctly, can transform the look of any vehicle. From thorough preparation, including cleaning, sanding, and priming, to careful application of the base and clear coats, each step is critical to achieving a professional finish. The finishing touches—wet sanding, buffing, and polishing—bring the paint job to life, adding depth and shine that make the vehicle look new.
Whether you’re considering doing it yourself or choosing a professional service, understanding each phase of the process helps ensure that you get the best possible results. Remember, the quality of the materials, the care taken during each step, and the attention to detail in the finishing touches all contribute to the longevity and beauty of the final paint job. By following this guide, you’ll be well-equipped to make informed decisions, ensuring your vehicle not only looks great but also maintains its value for years to come.

