When your vehicle is involved in an accident, the collision repair process can seem daunting and overwhelming. However, understanding each step involved in restoring your vehicle to its pre-accident condition can help you make informed decisions, manage your expectations, and ensure effective communication with your repair shop. This guide aims to provide a detailed, step-by-step overview of the collision repair process, making it easier for car owners, insurance claims adjusters, and potential customers to navigate the journey from accident to recovery.
Initial Assessment and Estimating
The first stage in the collision repair process is crucial—it sets the foundation for the entire repair journey. During this phase, the damage to your vehicle is thoroughly assessed, and an estimate for the repair costs is prepared.
Damage Assessment
Before any repairs can begin, the vehicle must undergo a comprehensive damage assessment. This involves two key components:
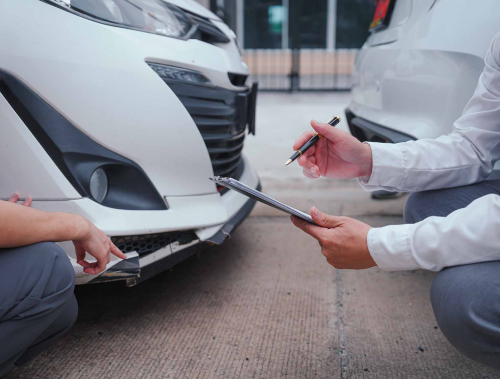
- Visual Inspection: The initial step in the damage assessment process is a visual inspection. A skilled technician examines the exterior of the vehicle, checking for obvious signs of damage such as dents, scratches, broken glass, and misaligned panels. This inspection helps identify the immediate repairs that are needed, and it provides a baseline for the overall condition of the vehicle.
- Hidden Damage Identification: While the visual inspection is important, not all damage is visible at first glance. Collision impacts can cause underlying issues that aren’t immediately apparent, such as structural misalignments or damage to internal components like the frame or suspension. To identify these hidden damages, repair shops often use advanced diagnostic tools and techniques. Discovering these issues early is critical, as they can significantly impact the safety and performance of the vehicle if left unaddressed.
Estimating the Repair Costs
Once the damage has been thoroughly assessed, the next step is to estimate the cost of repairs. This estimate provides a detailed breakdown of the work required and the associated costs, and it serves as a key document in coordinating with insurance companies.
- Cost Estimation Process: Repair shops use the information gathered during the damage assessment to calculate the estimated cost of repairs. This includes the cost of labor, replacement parts, materials (such as paint), and any additional services needed to restore the vehicle. The estimate is typically itemized, giving a clear picture of what each aspect of the repair will cost. This transparency is important for both the vehicle owner and the insurance company, ensuring that everyone understands the scope and cost of the work to be performed.
- Insurance Coordination: After the repair shop has prepared the estimate, it must be submitted to the insurance company for approval. The insurance company will review the estimate to ensure that it aligns with the policyholder’s coverage. This step can involve some back-and-forth between the repair shop and the insurance adjuster, especially if there are discrepancies between the shop’s estimate and what the insurance company is willing to cover. Clear communication and accurate documentation are essential during this stage to avoid delays and ensure that the necessary repairs are approved and funded.
Disassembly
Once the initial assessment and estimating process is complete, the next step in the collision repair process is disassembly. This stage is crucial because it allows technicians to access and thoroughly inspect all damaged areas, ensuring that nothing is overlooked.
Disassembly of Damaged Parts
Disassembly involves carefully removing damaged components to expose the underlying areas that need repair. This process is methodical and requires precision to avoid causing further damage.
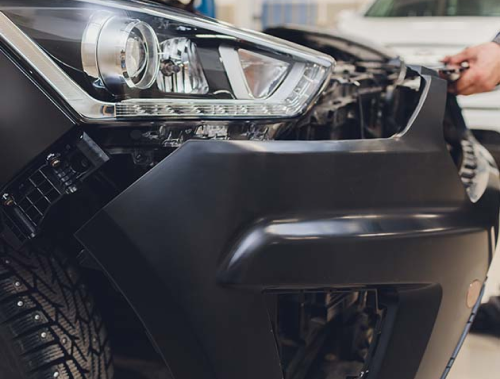
- Removing Damaged Components: Technicians start by removing any parts that were visibly damaged in the collision, such as fenders, bumpers, and lights. This step is essential for gaining access to deeper, structural elements of the vehicle that may also require attention. The disassembly process is done with great care to ensure that only the necessary parts are removed, preserving as much of the vehicle’s original condition as possible.
- Further Inspection: Once the damaged components have been removed, technicians can perform a more detailed inspection of the vehicle. This is where hidden damage, which wasn’t apparent during the initial assessment, often comes to light. For example, what appeared to be a minor dent might have caused significant misalignment in the vehicle’s frame. Identifying these issues at this stage is crucial, as they can affect the overall safety and performance of the vehicle if not properly addressed.
Documentation and Ordering Parts
After the disassembly and further inspection, it’s time to document the full extent of the damage and order the necessary replacement parts.
- Detailed Documentation: Every aspect of the damage and the parts needed for the repair must be meticulously documented. This documentation is not only essential for the repair process but also for maintaining transparency with the insurance company and the vehicle owner. Detailed records help ensure that all repairs are covered by insurance and provide a clear reference for the work that needs to be done.
- Parts Ordering: With the damage fully documented, the repair shop can proceed to order the necessary replacement parts. Depending on the vehicle and the owner’s preferences, these parts may be Original Equipment Manufacturer (OEM) parts or aftermarket alternatives. OEM parts are typically preferred for their guaranteed fit and quality, but they can be more expensive and may take longer to arrive. Aftermarket parts are often more readily available and can be a cost-effective option, though their quality can vary. The choice between OEM and aftermarket parts is an important consideration that should be discussed with the vehicle owner.
Structural Repairs
Structural repairs are among the most critical aspects of the collision repair process. Ensuring that the vehicle’s frame and structural components are restored to their original condition is essential for both safety and performance.
Frame and Structural Alignment
The vehicle’s frame acts as its backbone, providing the necessary support for all other components. Damage to the frame can compromise the entire vehicle, so it’s crucial to address any misalignment or structural weaknesses.
- Frame Straightening: If the vehicle’s frame has been bent or twisted due to the collision, frame straightening is required. Technicians use specialized equipment, such as computer-controlled frame alignment systems, to measure the frame’s alignment and adjust it back to the manufacturer’s specifications. This process is delicate and requires a high level of precision to ensure that the vehicle’s structural integrity is fully restored.
- Structural Integrity Checks: After the frame has been straightened, technicians conduct thorough checks to ensure that all structural components meet safety standards. This may involve using diagnostic tools to measure the alignment and strength of the frame, as well as visual inspections to confirm that there are no remaining defects. Ensuring the vehicle’s structural integrity is vital for its performance in the event of any future collisions.
Welding and Reinforcement
In addition to realigning the frame, welding and reinforcement are often necessary to restore the vehicle’s structural strength.
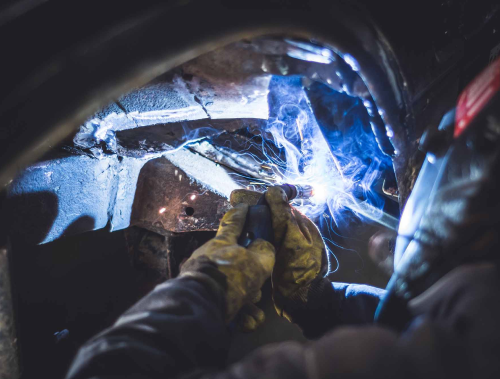
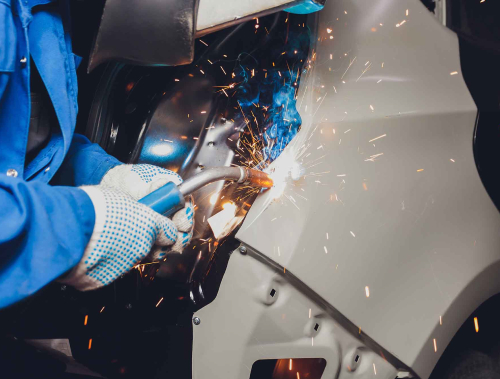
- Welding Techniques: Collision repairs frequently require welding to repair or replace damaged structural components. This could involve techniques like spot welding, MIG welding, or TIG welding, depending on the materials and the extent of the damage. Proper welding is crucial for ensuring that repaired components are securely attached and capable of withstanding the stresses of daily driving.
- Reinforcement of Critical Areas: In some cases, it may be necessary to reinforce certain areas of the vehicle to restore its original strength. This could involve adding additional welds, installing reinforcement plates, or using high-strength adhesives. Reinforcing critical areas helps ensure that the vehicle will perform safely in the event of another collision and prolongs the overall lifespan of the repairs.
Bodywork
Once the structural repairs are complete, the focus shifts to the vehicle’s exterior. Bodywork involves repairing or replacing damaged panels and preparing the surface for painting.
Dent Removal and Panel Replacement
Repairing the vehicle’s exterior is essential not only for aesthetic reasons but also for protecting the vehicle from further damage, such as rust or corrosion.
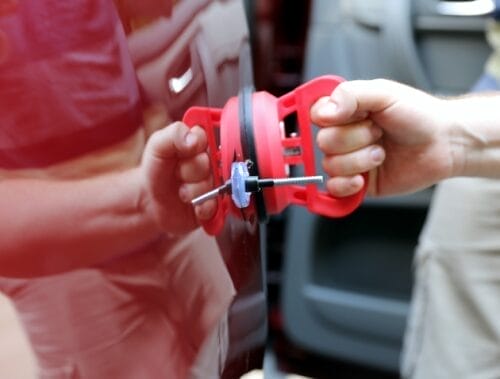
- Dent Repair Techniques: There are several methods for removing dents from the vehicle’s body. Paintless Dent Repair (PDR) is a popular technique for minor dents, where technicians use specialized tools to gently push the dent out from behind the panel without disturbing the paint. For more significant damage, traditional dent repair methods may be necessary, which involve filling the dent, sanding it down, and repainting the area.
- Replacing Damaged Panels: In cases where the damage is too severe to be repaired, the damaged panels may need to be replaced entirely. This could include parts like fenders, doors, or the hood. Replacing panels ensures that the vehicle’s exterior is fully restored to its pre-accident condition, with no signs of the previous damage.
Surface Preparation
Before the vehicle can be painted, the surface must be properly prepared to ensure a smooth and durable finish.
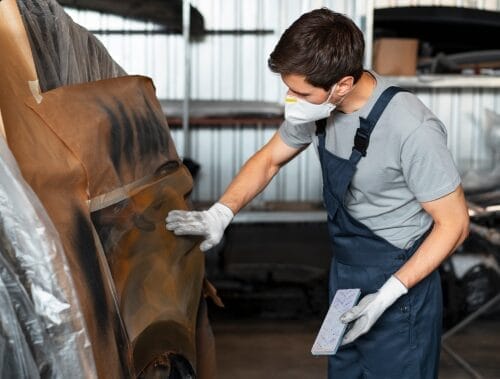
- Sanding and Priming: The repaired areas are sanded down to create a smooth surface, removing any imperfections that could affect the paint job. Once sanding is complete, a primer is applied to prepare the surface for the basecoat. The primer helps the paint adhere to the metal and provides a consistent color base.
- Rust Treatment: If any rust is detected during the repair process, it must be treated before painting. Rust can quickly spread and cause further damage if not addressed. Treatment typically involves removing the rust, applying a rust inhibitor, and then sealing the area to prevent future corrosion. Ensuring that the surface is rust-free is crucial for the longevity of the repairs.
Painting
Once the structural repairs and bodywork are completed, the next crucial step in the collision repair process is painting. A well-executed paint job not only restores the vehicle’s aesthetic appeal but also provides essential protection against the elements.
Color Matching and Application
Achieving a flawless paint job that blends seamlessly with the vehicle’s existing finish requires advanced techniques and attention to detail.
- Color Matching Technology: Modern collision repair shops use sophisticated color matching technology to ensure that the new paint perfectly matches the vehicle’s original color. This involves using computerized color-matching systems that analyze the existing paint and generate an exact formula to recreate it. These systems take into account factors such as the vehicle’s age, exposure to sunlight, and any previous paintwork, ensuring that the new paint is indistinguishable from the original.
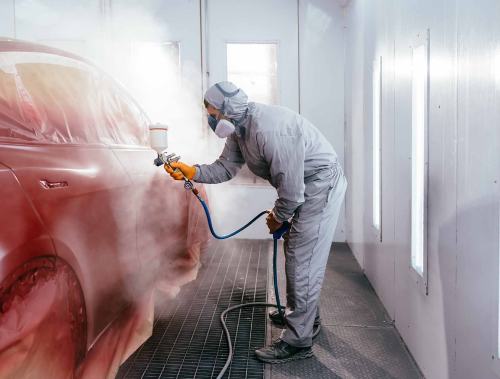
- Painting Process: The painting process involves several stages to achieve a smooth, durable finish. First, the prepared surface is coated with a primer, which helps the paint adhere better and provides a uniform base. Next, the basecoat is applied, which contains the color. Multiple layers of basecoat may be applied to achieve the desired depth and consistency. Finally, a clearcoat is added on top of the basecoat. The clearcoat provides a glossy finish and protects the paint from environmental factors such as UV rays, dirt, and moisture. The clearcoat also adds depth to the color, enhancing the vehicle’s overall appearance.
Curing and Polishing
After the paint has been applied, it needs to be properly cured and polished to ensure a long-lasting, high-quality finish.
- Curing the Paint: Once the painting process is complete, the vehicle must be cured to harden the paint and ensure its durability. Curing can be done using heat lamps or specialized curing booths that accelerate the drying process. The time required for curing varies depending on the type of paint used and the environmental conditions, but it is a crucial step for achieving a resilient and durable finish.
- Polishing and Paint Protection: After the paint has fully cured, the vehicle undergoes a final polishing process. Polishing removes any minor imperfections in the paint, such as dust particles or small surface scratches, leaving the surface smooth and shiny. In addition to polishing, a protective wax or sealant is often applied to the paint. This protective layer helps to guard against environmental damage and keeps the vehicle looking its best for longer.
- Finishing: The finishing stage involves a final inspection and touch-up of the paint job. Technicians ensure that the paint is even, smooth, and free of any defects. If any issues are detected, they are addressed immediately to ensure that the vehicle leaves the shop with a flawless, high-gloss finish.
Reassembly
With the painting complete, the vehicle is ready for reassembly. This step involves carefully reinstalling all the repaired and replaced parts to restore the vehicle’s full functionality.
Reinstallation of Parts
Reassembly is a meticulous process that requires precision and attention to detail to ensure that everything fits and functions correctly.
- Reinstalling Components: During reassembly, technicians carefully reinstall all components that were removed or replaced during the repair process. This includes everything from body panels and trim to lights, mirrors, and interior parts. Each component is fitted back into place with care to ensure that the vehicle looks and functions as it did before the accident. The goal is to restore the vehicle to its original condition, with no visible signs of the repairs that were performed.
- Testing for Fit and Functionality: After all components have been reinstalled, the vehicle undergoes a series of tests to ensure that everything fits correctly and functions as intended. This includes checking the alignment of body panels, ensuring that doors and windows open and close smoothly, and verifying that all lights and mirrors are properly positioned. These tests are crucial for ensuring that the vehicle is both safe and aesthetically pleasing.
Electrical and Mechanical System Checks
In addition to reassembling the vehicle’s exterior and interior components, it is also essential to verify that all electrical and mechanical systems are functioning correctly.
- Electrical System Testing: After reassembly, technicians test all electrical components to ensure they are working properly. This includes checking the vehicle’s lighting systems, power windows, locks, and any other electronic features. Any issues that are detected are addressed before the vehicle is returned to the owner.
- Mechanical Inspections: The final step in the reassembly process is a thorough inspection of the vehicle’s mechanical systems. This includes testing the brakes, suspension, steering, and any other critical systems to ensure they are functioning correctly. These inspections are vital for ensuring the safety and reliability of the vehicle after it has been repaired.
Quality Control and Final Inspection
The final stages of the collision repair process are crucial to ensuring that the vehicle is returned to the customer in optimal condition. Quality control and final inspections are performed to verify that all repairs have been completed to the highest standards, and that the vehicle is safe, functional, and aesthetically restored.
Final Quality Inspection
Before the vehicle is handed back to the owner, it undergoes a comprehensive final inspection to ensure every aspect of the repair meets quality standards.
- Comprehensive Review: Technicians conduct a detailed review of all repairs, carefully inspecting the vehicle’s exterior, interior, and mechanical components. This inspection covers everything from the alignment of body panels to the quality of the paint job, and the operation of electrical and mechanical systems. The goal is to identify and correct any issues before the vehicle is delivered to the customer, ensuring that the repairs are thorough and flawless.
- Test Drive: A test drive is an essential part of the final inspection process. During the test drive, technicians check the vehicle’s alignment, handling, and overall performance to ensure that it drives smoothly and safely. This includes testing the brakes, steering, suspension, and any other systems that could have been affected by the collision or repair process. The test drive allows the technician to detect any subtle issues that might not be apparent during a stationary inspection, ensuring that the vehicle is fully road-ready.
Detailing and Delivery
After passing the final quality inspection, the vehicle undergoes a thorough cleaning and detailing before it is returned to the customer.
- Final Detailing: The vehicle is cleaned both inside and out to remove any dust, debris, or residue from the repair process. This includes washing and waxing the exterior, cleaning the windows, and vacuuming the interior. Detailing is not just about aesthetics—it also ensures that the vehicle is presented to the customer in the best possible condition, reinforcing the quality of the repair work.
- Customer Walkthrough: When the customer arrives to pick up their vehicle, a technician or service advisor will walk them through the repairs that were completed. This includes showing them the repaired areas, explaining the work that was done, and answering any questions they might have. The walkthrough helps the customer understand the extent of the repairs and provides an opportunity for them to address any concerns before leaving the shop. It’s a final step in ensuring customer satisfaction and trust in the repair process.
Factors Affecting Repair Time
Several factors can influence how long it takes to complete collision repairs. Understanding these factors can help manage expectations and ensure a smoother repair experience.
Severity of Damage
The extent of the damage sustained by the vehicle plays a significant role in determining the repair timeline.
- Extent of Repairs Needed: Minor damage, such as small dents or scratches, typically requires less time to repair than more severe damage, such as frame misalignment or extensive bodywork. The more complex and extensive the repairs, the longer it will take to complete them.
- Hidden Damage: Sometimes, additional damage is discovered during the repair process that wasn’t apparent during the initial inspection. Uncovering hidden damage can extend the repair timeline, as additional parts may need to be ordered and more work may be required to restore the vehicle to its original condition.
Parts Availability
The availability of replacement parts is another key factor that can impact repair time.
- Parts Delays: If the parts needed to repair the vehicle are not readily available, this can cause delays. This is especially true if the parts need to be sourced from a manufacturer or a supplier that is far away, or if the parts are on backorder.
- OEM vs. Aftermarket Parts: The choice between Original Equipment Manufacturer (OEM) parts and aftermarket parts can also affect the timeline. OEM parts are made specifically for your vehicle by the original manufacturer, but they can take longer to arrive. Aftermarket parts, which are produced by third-party manufacturers, may be more readily available but could vary in quality and fit.
Shop Workload
The current workload at the repair shop can influence how quickly your vehicle is repaired.
- Current Shop Volume: If the repair shop is busy with multiple vehicles being repaired at the same time, this can impact how quickly your vehicle is serviced. High shop volume may lead to longer wait times, especially if the shop is understaffed or if the repairs are particularly complex.
- Scheduling and Prioritization: Repair shops often prioritize jobs based on several factors, including the severity of the damage, parts availability, and customer needs. Some shops may offer expedited services for an additional fee, while others may schedule repairs based on a first-come, first-served basis. Understanding the shop’s scheduling and prioritization methods can help set realistic expectations for when your vehicle will be ready.
Conclusion
Understanding the collision repair process is crucial for car owners, insurance adjusters, and potential customers alike. By familiarizing yourself with each stage of the process—from initial assessment to final inspection—you can make more informed decisions, manage your expectations, and communicate effectively with your repair shop.
Effective communication and transparency with your repair shop are key to ensuring a smooth and efficient repair experience. Don’t hesitate to ask questions, request updates, and verify the quality of the work being done on your vehicle. By staying engaged throughout the process, you can feel confident that your vehicle will be restored to its pre-accident condition, ready to get you back on the road safely.

